Sunday, July 28, 2013

Roasted Garlic and Mushroom Cream Sauce over Pasta

I have been meaning to post this for two days now, I guess life just gets away from you sometimes. Anyway, I don't know about you, but whenever we go out to eat at a pasta restaurant I almost always get some sort of creamy pasta dish and then pay for it the next day due to all of the cream and cheese. I really don't know why I do this to myself. I think for some reason the white sauces are just so much more a comfort food than a red sauce. I have tried to make cream sauces in the past and they just don't turn out like you get in a restaurant, so I had given up until now. Obviously from my previous posts I am still obsessed with cashew cream and the versatility of it.

One night this week we did not feel like what I had on the menu, so instead of heading out to eat and spending money I went scouring my pantry and throwing things together and this recipe emerged. I was smart enough to actually write this one down and take pictures, most of the time that doesn't happen and I almost always regret it. After I tasted this I was dancing around my kitchen because I knew this was a recipe I was excited to share with you.

As far as the family front and their opinion Mark did really like this one. I actually think he went back for seconds. Ashlyn on the other hand preferred the garlic bread that was served with this pasta dish. She did take two bites of the pasta, like I asked, and that was it. It really didn't surprise me because she prefers tomato based pasta sauces over creamy ones I mean she doesn't even like mac and cheese. If this had been tomato based I am sure she would have had two helpings. I knew she probably would not eat it, but I made it anyway because if I cooked around her requests all we would eat would be tacos, pizza, and tempeh. OK I am done rambling here is what you have been waiting for.

Roasted Garlic and Mushroom Cream Sauce over Pasta

 2 heads of garlic
drizzle of olive oil
1/2 c soaked cashews
2 c almond milk
1/2 tsp salt
1/4 tsp pepper
1/2 tsp cornstarch
8 oz cremini mushrooms sliced
1 medium onion diced
handful of baby spinach chopped
1 tsp dried basil
12 oz farfalle pasta

1. To soak your cashews put them in a bowl, cover with water, and place them in the fridge overnight.
2. Preheat the oven to 400 degrees.
3. Cut the top 1/4 off of each of the heads of garlic. Place each head on a square of foil and drizzle with olive oil. Wrap the foil around the garlic like a little pouch. Place the two garlic pouches in an oven safe dish and place in the oven. Roast for 30 minutes. Remove from the oven and let the garlic cool down.
4. While the garlic is cooling cook the pasta according to the package directions.
5. In a saute pan drizzled with olive oil add the mushrooms and onion. Saute on medium heat until the mushrooms are browned and the onion is translucent.
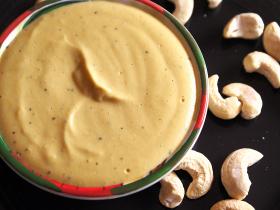
6. Once the garlic is cooled remove the cloves from the garlic paper and add all of the cloves to a blender. Also place cashews, milk, salt, pepper, and cornstarch in the blender. Blend for about 2 1/2 minutes (depending on your blender), until you have a smooth consistency.
7. Add your cream sauce and basil to the pan with the mushrooms and onion. Whisk the sauce every couple minutes until it starts to thicken.
8. Once the sauce thickens remove from the heat and stir in the spinach.
9. Serve over pasta and enjoy.


*Next time I make this I will probably use double the amount of mushrooms.
 * I always keep soaked cashews in my fridge so I have them on hand, just keep them in water and change the water every few days.


Tuesday, July 23, 2013

My High Needs Child

The day I became a mom is definitely number one on the list of the happiest days of my life (sorry Mark). It was also the day that my world as I knew it did a back flip. I was responsible for my daughter now and her needs came before anything else. I was overjoyed and already exhausted (I went into labor at 9 pm and gave birth at 6:58 am) little did I know that the exhaustion was just beginning.

From day one we knew Ashlyn was a little spitfire. Isn't it funny that as a mom even on the first day of life you already have a perspective on your child's personality? We found out in that first day that everything we thought we knew about being a parent did not really apply to Ashlyn. She would cry of course, but this was no ordinary cry, it was an I am hungry and I want it now kind of cry. She really only slept for a few sporadic hours, and was very alert for only having been born that morning. She also had to be held and would cry her "need it now" cry if she was put down. We could also see in her little eyes that she was constantly studying the world around her. That first night was a rude awakening, OK never mind I didn't get any sleep that night so that might not be the right phrase. One of the few things I do remember about that night was our night nurse who made a comment, "I don't know why she is not sleeping, babies always sleep the first night." Ha Ha, not my child! Anyway these are the traits I saw the first day that gave me an indication of the ride I was about to take.

Looking back now I can laugh, but back then I was shocked!  Babies are supposed to give you hunger cues before they cry. I promise you I looked for them, but alas they just never appeared. A newborn is supposed to sleep 15-18 hours a day. Because mine didn't. You don't need to hold your baby all of the time. Really, because mine would freak out if I put her down. How could this be? Everything that I had read in books and that we were taught in classes just did not happen. These were supposed to be professionals giving this advice right? Ha Ha yeah right, I can tell you now after having experienced it myself most books and classes will not cover raising a high needs child. Through trial and error you will learn what is best for your child, your self, and your sanity.

OK, so many of you out there probably don't know what a high needs child is, and to be honest I had no idea myself until Ashlyn was about 18 months old. I just thought she was a little different than most babies, until I came across Dr Sears' website and the section High Needs Baby. I was so excited to find this little section on a website that helped me to understand my child a little bit better.  The 12 features of a high needs child are: Intense, Hyperactive, Draining, Feeds Frequently, Demanding, Awakens Frequently, Unsatisfied, Unpredictable, Super-Sensitive, Can't Put Baby Down, Not a Self Soother, and Separation Sensitive. Below are examples of how Ashlyn fits into each category now as a toddler.

Intense: We call this passionate. She has always known what she wants and just goes for it.

Hyperactive: She is always on the move. Mark commented that he wishes he could "bottle that up" and sell it as a new energy drink.

Draining: She always wants to share her adventures with the people around her.

Feeds Frequently: Even as a toddler she constantly wants to eat and out eats me on occasion.

Demanding: She constantly needs attention and wants to be involved in anything you are doing.

Awakens Frequently: She did not sleep through the night until she was 16 months old. Even as a toddler she is not a great sleeper. She sleeps maybe 9 hours at night with a 30 to 60 minute nap during the day.

Unsatisfied: This one has never really applied to her.

Unpredictable: You just never know if you are going to get a good day or a bad day.

Super-Sensitive: She wears her emotions on her sleeve (and her face) so you always know how she is feeling.

Can't Put Baby Down: Even as a toddler she still loves to be hugged, rocked, and cuddled.

Not a Self Soother: When upset she has a hard time calming down and lots of cuddles are the only help.

Separation Sensitive: She hates to see people leave. She will cry when people leave our house.

 Until you have lived with a high needs child you may not understand any of this or why it is so important to post. I have to say that the first 6 months were probably the hardest. At that point we quit taking people's advice and we did what we felt was best for our child. If you have a high needs child you understand how much advice people (even complete strangers) are willing to give. The best advice I can give since having Ashlyn is to do what is right for your family (and sanity) and take time at least once a week to do something that makes you happy even if it is just 5 minutes alone in the bathroom painting your toes. Because as the old saying goes if mama isn't happy no one is happy.

The best thing we did for our family was to embrace Ashlyn's qualities. It is OK that we held her all of the time as a baby and still do. It is OK that I cried right along with her on many a night. It is OK that we unintentionally co-slept and slowly transitioned her to her crib and then her crib out of our room at around 20 months. It is OK that she used a bottle until she was 16 months old. It is OK that I still rock her to sleep at 2 1/2 years old. It is OK that I take time for myself once in awhile. And it is OK that she does things on her own terms and not before.

We know that she is a passionate, creative, and intelligent child that puts her whole self into her activities. We know that as long as we embrace the traits that make Ashlyn who she is she will grow into the person she is meant to be.

Wednesday, July 17, 2013

Roasted Tomato and Onion Bread Salad

Have you ever come across a picture of some sort of food and said to yourself "I just have to have that"?  That is what happened to me with this bread salad. I was looking through the newspaper at the office and came across this recipe for a tomato, onion, and bread salad and knew at that moment I had to have it. I also knew I could improve the recipe a lot to fit my tastes. So, that is how this salad was created. I have to urge you to try this because I don't think you will be disappointed.

I loved it, but my family was on the fence. Ashlyn loved it while it was sitting on the counter and I was getting the other elements of dinner together. She kept coming up to me asking for more bread out of the bowl and I of course let her have some and it was met with Mmmms. Then comes dinner time and I put in on her plate and she won't even try it. This one I definitely did not push on her partly because I knew she had already had quite a few bites and also (I confess) because it was so good I wanted it for myself. Mark on the other hand wouldn't even try it. He now likes bread, tomatoes, and onions separately, but I think it may have been too much for him all mixed together in a salad. Oh, and I say now because he used to tell me that he hated tomatoes and onions, but now that we changed our diet all of a sudden he likes them and will actually admit to it. Getting him to admit that he likes something that he previously disliked is a challenge in and of itself.

So, all in all this did not go over great with the family, but to be honest I really did not care because that just meant more for me! I also had the leftovers the next day warmed up and they were still very good, the bread was not as crunchy, but it was still drool worthy.

Roasted Tomato and Onion Bread Salad

1 pint cherry tomatoes
1 medium onion sliced
2 Tbs olive oil
1/4 tsp pepper
1/4 tsp salt
1 tsp balsamic vinegar
2 1/2 c cubed bread
3 Tbs olive oil
1 Tbs nutritional yeast
1/4 tsp garlic powder
1/4 tsp dried basil
1/4 tsp dried thyme
1 tsp fresh basil chopped

Preheat oven to 400 degrees. Place tomatoes and onion slices on a baking sheet. Drizzle with 2 Tbs olive oil and add salt and pepper. Toss with your hands to coat the tomatoes and onions. Place the baking sheet in the oven for 14 minutes. Remove from the oven and dump the tomatoes and onions into a bowl. Add balsamic vinegar and toss to coat. In a separate bowl whisk together 3 Tbs olive oil, nutritional yeast, garlic powder, dried basil, and dried thyme. Add the cubed bread and toss to coat. Place bread on same baking sheet that the tomatoes and onions were on and place in the oven. Bake for 7 minutes then remove from oven and place the bread in the bowl with the tomatoes and onions. Combine the contents of the bowl and add the fresh basil. Enjoy warm or at room temperature.
*If you have leftovers you can store them in the fridge and it is good warmed up the next day.
*I know it is summer, so if you don't want to turn on your oven you can easily grill the tomatoes, onion, and bread instead of roasting.


Monday, July 15, 2013

Milk does not do a body good in our family

I really want to share our family's story of why we cut dairy from our diet especially with a toddler in the house. I came across the below article a couple of weeks ago and it inspired the topic of this post. Now, I am not a health care professional and this is not medical advise. This is just our story.

                                                                            Source


Milk does a body good?

Milk was always a big part of my diet growing up. My mom can attest that I was a milk junky. It also did not stop with milk, I was in love with all dairy. That is probably why I worked at the local Dairy Queen in high school and college. I mean really, soft serve ice cream around all of the time, who could resist? I also remember when I was growing up always having digestive issues. I  had random stomach aches quite often and I would also vomit on occasion which would usually make the stomach ache go away. I did go to the doctor for this and they could not find anything physically wrong, so we just figured I had a "weak" stomach and it was something I would just have to live with.

Fast forward to my mid twenties, I started having some painful abdominal cramps which I had never had before. These were very sporadic and didn't occur very often at all until I hit my late twenties. That is when I would get these cramps all of the time and this really scared me (oh yeah, google painful abdominal cramps and I am sure it will indicate that you are dying). Now, I went to the doctor again because this was defiantly a change. So, they did an ultrasound and other tests that came back fine. I was told that I probably had IBS and just had to live with it.

I then got pregnant and had my beautiful baby girl. At two months she was diagnosed with MSPI and since I was breastfeeding I had to eliminate dairy and soy from my diet. Now, I did have the IBS throughout my pregnancy, but the funny thing is once I was on the no soy and dairy diet my abdominal cramps went away. I could not believe that for four months I was cramp free! I quit breastfeeding when Ashlyn was 6 months old and I admit that I am weak for dairy and soy, so that was back on the menu and wouldn't you know the cramps came back. Now, at this point in my life I was so sleep deprived and busy with family and work that I really just did not care about the pain.

Fast forward to Ashlyn's first birthday. We tried giving her cows milk and it did not go well, so we switched her to soy milk and she did great. After her 1st birthday we tried cow's milk on and off, and by the time she was 18 months the cow's milk seemed to finally agree with her tummy. I was very happy at that point because now we could buy the less expensive cow's milk. Around this time I went to see a GI doctor. I told him about how my IBS issues cleared when I removed dairy and soy from my diet, but he was not convinced and told me if it is IBS there is no known cause, it just happens. He wanted to do some invasive tests that I declined, but I did agree to do a blood test for a gluten allergy and that came back fine. At this point I was fairly convinced that my issue was dairy related.

Fast forward to January 2013. At this time Mark, Ashlyn, and I all seemed to be having digestive issues. That is when Mark and I really started doing research on our diet and how our digestive issues were most likely due to our diet. All of a sudden a light bulb was turned on and we made some drastic changes to our diet. After 2 weeks of removing all processed food, dairy, eggs, and meat from our diets our digestive issues were clearing up and as time went on they just continued to get better. We also saw an improvement in our congestion, sleep habits, and energy levels among other things.

I look back now and I am positive that dairy was the culprit in my life long battle with my "weak" stomach. Mark and I love cheese (Ashlyn has never really liked it unless it is on pizza), so that was the hardest to remove from our diet. We do have times now where we do eat cheese and when I do I feel the effects. I cannot say that I will never eat cheese again, because that would be a lie, but at least know I can make a choice knowing the consequences of my actions.

We now have unsweetened almond milk in our home and that is what Ashlyn drinks as her milk. We have discussed this with Ashlyn's pediatrician (who we love) and she is perfectly fine with our decision to remove dairy from Ashlyn's diet. She said that dairy and meat are not necessities in her diet. Because this diet change is always a learning process, and I know we do not get enough dark leafy greens in our diets we all take a multivitamin to make sure we are all getting enough iron and vitamin B12. So, in the article the Dr. suggested making the recommended dairy intake 0-3 servings per day. I want to tell you that we are mostly in the 0 servings per day and our tummys could not be happier.

Thursday, July 11, 2013

Taco Flavored Pinto Beans and Individual Taco Pizzas

I told you there would be a reason and this is it. This is the reason you got two sauce recipes in a row. Believe me this is definitely worth the wait if you want a quick and yummy meal. OK, quick if you have the two previous sauces made and waiting for you in the fridge. If not it is still fairly quick with a fast blender rinse in between making the sauces.
I have a serious love of Mexican food, but if we go out to eat it usually does not love me. Tacos, burritos, enchiladas, and of course my all time favorite the chimichanga. I am fairly sure my love of Mexican food is in my genes because my whole family loves it. My parents can lots and lots of salsa every year, which is delicious by the way. OK dad maybe not the hot stuff, in my opinion, but I know that is the boys' favorite. My mom makes delectable chicken enchiladas which are of course smothered in cheese and have a sour cream based sauce on top. I can't even tell you how good those are. I am fairly certain that part of the reason Mark married me was because of those enchiladas. I am also fairly certain I have passed my Mexican food loving genes onto Ashlyn. When asked what she wants for dinner tacos are always on the list (along with pizza and tempeh).
That is why I love the two recipes below. I love the bean recipe because instead of the beans being cooked in water, like I have seen, they are cooked in a delicious taco flavored broth and end up picking up that flavor all the way through the bean. I also love the individual pizzas because they can be a super quick dinner if you do a little prep before hand and they can be customized to each persons taste. I love everything listed below on my pizza, but Ashlyn just wanted beans, tomato, and olives on hers. This is a dinner that can make everyone in the house happy and you can feel good knowing that you are serving plant based whole foods.

Taco Flavored Pinto Beans

1 c dried pinto beans
1 bay leaf
1/8 c cumin
1/8 c minced onion
1 Tbs chili powder
1 Tbs dried coriander
1 Tbs Spanish paprika
1 Tbs garlic powder
3 c water
salt and pepper

Rinse and sort your pinto beans. Place all ingredients except the salt and pepper in a slow cooker and cook on low for 8 hours. Drain any excess water, salt and pepper to taste, and use your flavored beans anyway you would like. These store fantastic in the freezer, so if you have any left freeze them for future use.


Individual Taco Pizzas

Taco Flavored Pinto Beans (mashed)
Whole Wheat Tortillas
Cheeze Sauce
Lettuce
Tomato
Black Olives
Ranch Dressing

Preheat your oven to 400 degrees. While the oven is preheating take as many pinto beans as you would like and mash them with a potato masher or fork (the potato masher is much easier). Once preheated put your tortillas on a sheet tray and toast in the oven for 5 minutes. Watch these closely as oven temps vary and they can burn very quickly.
Once toasted spread your mashed beans on the tortilla. Spread your cheeze sauce on top of the beans. Put in the oven for another 2 minutes to warm up the spreads.
Top with your favorite taco pizza ingredients. I used iceberg lettuce, tomatoes, black olives, and a drizzle of ranch dressing. If they would have been in my fridge I probably would have also added avocado and green onions to mine, so adjust the toppings to your tastes and preferences.

Wednesday, July 10, 2013

Ranch Dressing

Oh ranch dressing how I missed thee, until I developed this recipe that is. I have to say that Mark and I were addicted to ranch dressing before we changed our diet. It was our condiment of choice for fry dipping, on top of baked potatoes, and burgers, etc. I would have to buy 2 big bottles of ranch at Sam's Club about every two months. Then I started reading ingredient labels and our beloved Hidden Valley disappeared from our lives. Luckily we did not have to ween Ashlyn since we never gave it to her anyway.

I have a confession, I am currently obsessed with cashew cream, if you haven't noticed from this post and my Cheeze Sauce. So, if you see more sauces coming out of my kitchen with cashew cream don't worry, my obsessions tend not to last too long and I will move onto something else eventually.


OK, so I know this is my second sauce recipe this week, believe me there is a point to it and I will post it soon I promise.

Ranch Dressing

Ingredients:

1/2 c soaked cashews
3/4 c unsweetened almond milk
1 tsp dried dill
3/4 tsp dried chives
1/2 tsp garlic powder
1/2 tsp dried parsley
1/2 tsp salt
1/4 tsp minced onion
1/8 tsp pepper
1/2 tsp apple cider vinegar

You first need to soak your cashews overnight. Place the cashews in a bowl, cover with water, and place in the fridge overnight.

Once the cashews have soaked overnight drain the water and place them in the blender. Add all of the other ingredients into the blender and blend on high for about 5 minutes or until you reach your desired consistency. If you do not have a high speed blender this will take at least the full 5 minutes to get a smooth consistency. Also, feel free to adjust the amount of milk to make it as thin or as thick as you like. Refrigerate for at least 30 minutes before serving. It will thicken up a little in the fridge.

Monday, July 8, 2013

Cheeze Sauce

Sorry I haven't posted in awhile, I have been very busy developing new recipes. So, keep coming back because in the next couple of weeks I should have a lot of new recipes for you.
One of the things that I have missed most since removing dairy from my diet has been cheese. Oh how I loved the stuff, but starting in my mid-twenties it did not love me. So, once we changed our diet I found in vegan cookbooks and on vegan food blogs the term cheeze sauce. I was definitely intrigued. I tried a couple versions, but non of them gave me that taste and texture I was looking for, so I decided to develop my own version to suit the tastes of our family. After a few attempts I finally came up with a basic cheeze sauce that we have fallen in love with! Finally, I can have mac and cheeze, nachos dripping in cheeze sauce and whatever else my little heart desires. This is definitely a big hit in our house, so please try it as a healthier version of the "Velveeta" cheese sauce because I know you will not be disappointed.

Cheeze Sauce

1/2 c cashews
1/2 c nutritional yeast
1 c unsweetened almond milk
3/4 tsp salt
3/4 tsp ground mustard
1/4 tsp cornstarch
1/4 tsp pepper
1/2 tsp garlic powder

You first need to soak your cashews overnight. Place the cashews in a bowl, cover with water, and place in the fridge overnight. I usually just keep a bowl of soaking cashews in the fridge so I can have this cheeze sauce whenever the urge hits.

Once your cashews have soaked drain the water and place all of the ingredients in your blender. Blend on high for about 5 minutes if you are lucky enough to have a Vita-Mix this should not take as long. I will usually stop it a couple times to scrape down the sides.

Once blended pour the mixture into a small sauce pot and heat on medium low. You want to watch it very closely at this point. Whisk every couple of minutes until you reach your desired consistency. It will take a little while to thicken up, but once it starts it can get really thick really fast. If it becomes too thick whisk in a splash of milk until you reach your desired thickness.

Enjoy your cheeze sauce and keep those cashews soaking because I know you will want this again and again.